Wednesday, April 25, 2012
Flower Power with an Irish Rose Pillow
I love the Irish Rose crochet pattern! I took it to the extreme and made a 10 petal layer pillow front with it and a solid spiral for the backing. The yarn it Baby's First and so so soft. This pattern is so adaptable and lots of versions can be found lots of places online. I love it!
Sunday, April 1, 2012
Vintage Grocery Sign and Distressing Tips

...or at least I hope it looks like it! I've been enjoying doing some crafting for my real life home and signs like this are my new obsession. Once I found the key to getting the lettering to look the way I wanted, I was off and running!
I used to print the lettering on the computer and try to transfer the design by using pencil on the back and pressing hard. Uh... not very effective! I saw a tip online to use a ballpoint pen and create an indent in the wood but found it just wasn't distinct enough. I finally tried using my stylus (like for scrapbooking or other paper crafts) and found what I was looking for! The indent was deep enough that even I could see it and paint it.
One little painting tip: I added paint thinner to make the painting easier but found that it really soaked into the wood this way and the distressing was harder. If you really want a weathered look, you may want to play with paint thicknesses to get the effect you want.
For weathering:
- I used a mixture of india ink and alcohol to grey the wood before painting and make it look older.
- For more blotchy areas where you want the top coat of paint to flake off completely, use your fingers to apply a little wax (like mini-wax), vaseline, or even chapstick! Paint right over it, allow the paint to dry COMPLETELY and then scrape it off. Voila! Blotchy paint!
- To "sand" it, I used a steel wire brush from the electronics section of Home Depot (the guy though I was crazy). I have no idea what they use it for, but I've commandeered it for a much more fun purpose!
Happy Distressing!
Saturday, January 14, 2012
Waiting in the Wings; Beacon Hill Girl's Bedroom
If you're like me, you often have a mini collection of items for a room long before the room is really prepared to feature them. If you are really like me, it's because you like to flit back and forth between projects! :)

I have a dedicated shelf in my craft room with simple foam board partitions to separate "rooms." It just makes me happy to see my minis on display even if the house is still under construction.

Here's a walk about the furniture and pretty things for the girl's room in the Beacon Hill School.

The daisy bedding is a twist on a technique by Brae at her wonderful Otterine blog. Thanks, Brae! Take a visit!

The rocking horse is an old metal pencil sharpener. I love the patina just the way it is and will not be painting it.


By the way, you can still see close ups of pictures even though blogger has changed it to the slide show format that makes it so tiny! Here's how:
1. Click on the picture as usual
2. Right click on the picture with your mouse and select "Open in new tab"
3. The "new tab" version is zoom-able :)
I have a dedicated shelf in my craft room with simple foam board partitions to separate "rooms." It just makes me happy to see my minis on display even if the house is still under construction.
Here's a walk about the furniture and pretty things for the girl's room in the Beacon Hill School.
The daisy bedding is a twist on a technique by Brae at her wonderful Otterine blog. Thanks, Brae! Take a visit!
The rocking horse is an old metal pencil sharpener. I love the patina just the way it is and will not be painting it.
By the way, you can still see close ups of pictures even though blogger has changed it to the slide show format that makes it so tiny! Here's how:
1. Click on the picture as usual
2. Right click on the picture with your mouse and select "Open in new tab"
3. The "new tab" version is zoom-able :)
Saturday, December 31, 2011
Beacon Hill Classroom Progress
Happy New Year, everyone! I know I should be posting on resolutions or reflecting back on this year, but the light was coming through so beautifully, I couldn't resist taking these pictures. :)
This is the main classroom in the Beacon Hill Girls' School. In the foreground is a small teaching area (what subject, I don't know yet!)with a standing chalkboard on the right that I'll show in more detail later. In the background, you can see a hint of the traditional American schoolhouse desks sitting on some checkboard patterned paper. That's my way of trying out different flooring ideas.
The top picture also shows my crown moulding shortcut. After wasting many pieces trying to cut the proper angle, I finally decided to cheat and make the corners square cut and put a section of wood block in the corner. A fancy finial will come later. You decide: crafty or cheating?
Again, blog friends, Happy New Year! I hope that 2012 is full of everything that is good and lovely for you and all your loved ones!!
Friday, December 16, 2011
School Necessities
Saturday, November 26, 2011
Built in Cabinetry and a Mystery Gap

I wrestled with whether to make the final room in the Beacon Hill first floor a kitchen or a library. Then I looked at this Home Economics class picture above from my 1920's textbook and I realized that no education for girls of the time would be complete without a teaching kitchen! I already had the Chrysnbon stove below and it certainly fit. Decision made, I moved ahead.
There is a strange gap between the windows and a support structure in the Beacon Hill that has always bothered me. If I did ceiling trim, where would I put it? Inside? Outside? I could do ceiling beams but that didn't fit the Beacon Hill's architectural story in my mind.
I put in open shelving below the windows, but the gap still drove me crazy.
Well, what kitchen can't use more storage? The solution: Cover it up as built in cabinetry! Here's a preliminary mock up using foam board. Purchased shutters from miniatures.com would function as panels for the cabinet doors.
I built a simple table and covered all of the foam panels with balsa, the shutters and pieces of trim wood. Wondering what the opening cabinet door is for?
It's a drop down ironing board, also authentic to the very modern 1920's kitchen.
Here it is covered with a cute fabric that will have to be changed out because it just doesn't match!
Now the next question is paint or stain? To be continued...
Labels:
beacon hill,
building,
kitchen,
shutters
Sunday, November 13, 2011
Built In Bookcase for the Beacon Hill School
You spoke and I listened! Thank you all for the input on the bookcase from my last post; you said that a big bookcase overwhelmed the space and blocked the stairs. Oh, my...this non-builder then had to build something a bit more custom to allow for display space and an entry area that worked with the architecture of the Beacon Hill rather than against it! Well, how did I do?
I'm planning on a combination of faux boix effects and paint to match the existing paneling and to cover all of the random wood types that I had to use. (I told you I'm not a builder!)
That fiddly bit of cut arches and flat topped post were meant to match the existing stairs. Lots of finish work to do!
View from the front door:
I can picture students stopping here to set down lunch pails and remove wraps before going to classes.
Thank you all for pushing me to stretch my skills! I'm so much happier with this version :)
Labels:
beacon hill,
bookcase,
built-in,
school,
wainscoting
Saturday, November 5, 2011
The Room Next Door
I've shifted next door from the main classroom and moved to the foyer. For those of us who know and love the Beacon Hill, it has a wonderful turned staircase that I fell in love with as a child. It takes up quite a bit of space but adds a little architectural interest to the room. I added some more wainscoting for more interest too :)
I'm using PA dutch style colors which I love but I've got a decision to make and I'd love your advice! If I place this bookcase or one scaled down a bit, it creates more of a cozy room feel, allows me to display books and objects and creates a nook behind it for students to hang jackets and lunchpails.
This picture below is without the bookcase. (Ignore the weird paint job on the doors!) I'm not even sure if I should leave the stairs wood or not? If I had the woodworking skills I would rebuild the stair railings... maybe in the future!
and again, with the bookcase below. I'm leaning towards the bookcase... what do you think?
Labels:
beacon hill,
bookcase,
molding,
wainscoting
Friday, October 28, 2011
Extreme Mini Makeover!
Oh, the colors of the 80's! My poor Beacon Hill was subjected to the teal and aqua color scheme that would be just right for an episode of Golden Girls but NOT for a classy lady like the Beacon Hill! In my 12 year old eyes though it was perfect :)

A few layers of Gesso and a calming shade of "Hearth" by Martha Stewart tinted with a bit of white, and I was ready to begin adding some architectural details. The crown molding and baseboard is from Manchester Woodworks' Ebay store but I took a low tech and low budget way to add the wainscoting details.
The wider wood pieces are just strip wood from the craft store and the rounded edges for adding a sort of bullnose edge and to fill in the annoying gaps in the bay windows are made from...
Bamboo skewers from the grocery store! Fifty for $1... how's that for a deal? :)
And here it is painted, although still looking rather rough. I'm not sure if white is the best of if I should go with the deep shade of green on the baseboards for a more 1920's authentic look?? I'd love your input!
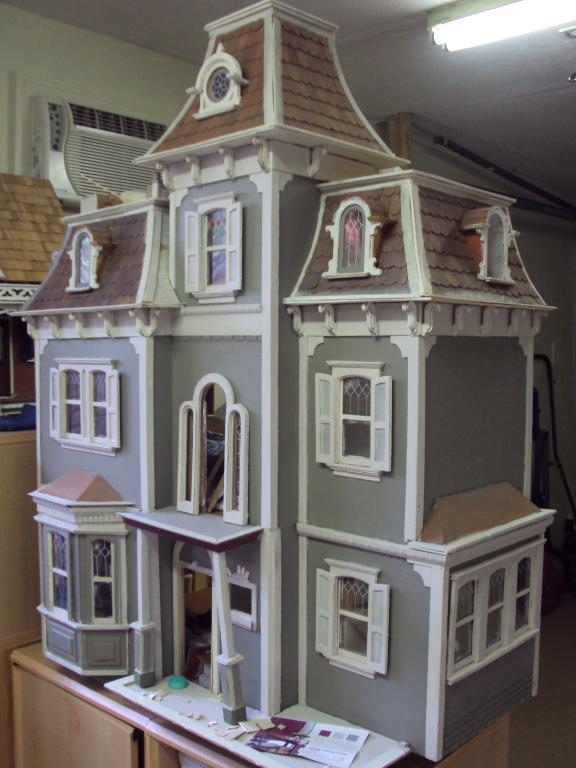
For those of you who like to know the backstory of how the Beacon Hill became mine, here are my former posts: Christmas and Here. It was quite a challenge finding just the right color for the exterior (chronicled here) but the interior was even more desperately in need of some serious makeover work!!
Ah, that's getting better! How did I get there? So glad that you asked!
Saturday, October 22, 2011
Shabby Miniature Bureau Tutorial
I made this bureau for my Orange Blossom and it's still one of my favorite pieces I've ever made from scratch! I'm going to let you know the secret of how I made it from a very ragged block of wood. Ready for the transformation?
I adore the crackle finish and the very chipped patch was a happy accident which is, of course, the very best kind! The open drawer is fun to drape items from and adds to the illusion...
because the drawers are all faux!
Here is the original block of wood that I salvaged from an ugly mini sofa. I cut a piece of basswood a little larger than the top and then went to work with my budget savvy molding method: I cut very bumpy case molding and cut it into long thin strips of various widths. It's the perfect scale for detail trim!
I then used precut wood rectangles and applied them as false drawer fronts, outlining them with my mini-molding from above. Next trick: the open drawer is simply held out with skinny strips for the side and bottom to give the impression of depth.
Here's where it looks as if I've lost my mini mind: I painted it shades of orange and red, using the deepest shades for inside the faux drawer to add the impression of depth. It is all very blotchy and smudged which adds to the realism for the crackle finish.
I applied the crackle finish according to directions and painted the whole thing a lovely shade of white. Add feet and a little hardware it here it is in it's proper home. Who says drawers have to open? :)
Thursday, October 13, 2011
Beacon Hill Identity Crisis
Well, maybe not a crisis yet; but it could be if I stay this indecisive. Can I have a little sympathy? :)
It's fall which seems to restart my minis interest; some kind of nesting instinct, I guess! I've come back around to rehabbing my childhood Beacon Hill and was still wrestling with what to make of it. Another house? Modern family who likes antiques? PA dutch influence? No, that just clashes with the Victorian architecture. I just wasn't feeling anything until I thought of this idea:
I believe it's going to be a girls' school that takes in a boarder or two. I am a teacher and collect antique schoolbooks and recently found a "Elementary Home Economics" course book for girls of 1922 teaching everything proper about Cookery, Sewing, and Care of the Home." It is delightful!
Labels:
antique,
beacon hill,
school
Subscribe to:
Posts (Atom)