Previously, I wrote in this blog about my color woes, trying so hard to find the just the right shade of paint for the exterior : http://antiquedaisy.blogspot.com/2010/02/house-of-many-colors.html And no wonder! Look through the pics below to see all the patches of color that I was trying out! I was limiting myself to acrylic craft paints. Thank goodness for Martha Stewart.
Saturday, October 9, 2010
Finally Found it: Beacon Hill Update
I finally found the right shade of paint for my Beacon Hill! This is my childhood house, the memories of which reawakened my interest in miniatures about two years ago. The background story is here with a little more follow up here and here (<--- click on the words to link to those posts). It starts as a good Little-Girl-on-Christmas-Morning story, then descends into a tale of Dollhouse Neglect. Now I hope we are getting a little closer to Happily Ever After! What do you think?
I love this shade of paint by Martha Stewart called Mushroom. It is just the right shade of gray with undertones of olive or even blue depending on the light. I've also weathered the shingles a bit with shades of gray and alcohol-ink washes to grey them a bit closer to realism as well. The epiphany came when I realized that tester-size pots of paint were available for less than $3 a piece in every possible shade that the paint store could come up with. Since I am SO dependent on color for inspiration, I just couldn't move on to anything else with this house until the exterior color was right. I also found some nifty ways to add more architectural interest to the outside of the house and break up some of the vertical lines. More details to come in future posts!
Friday, October 1, 2010
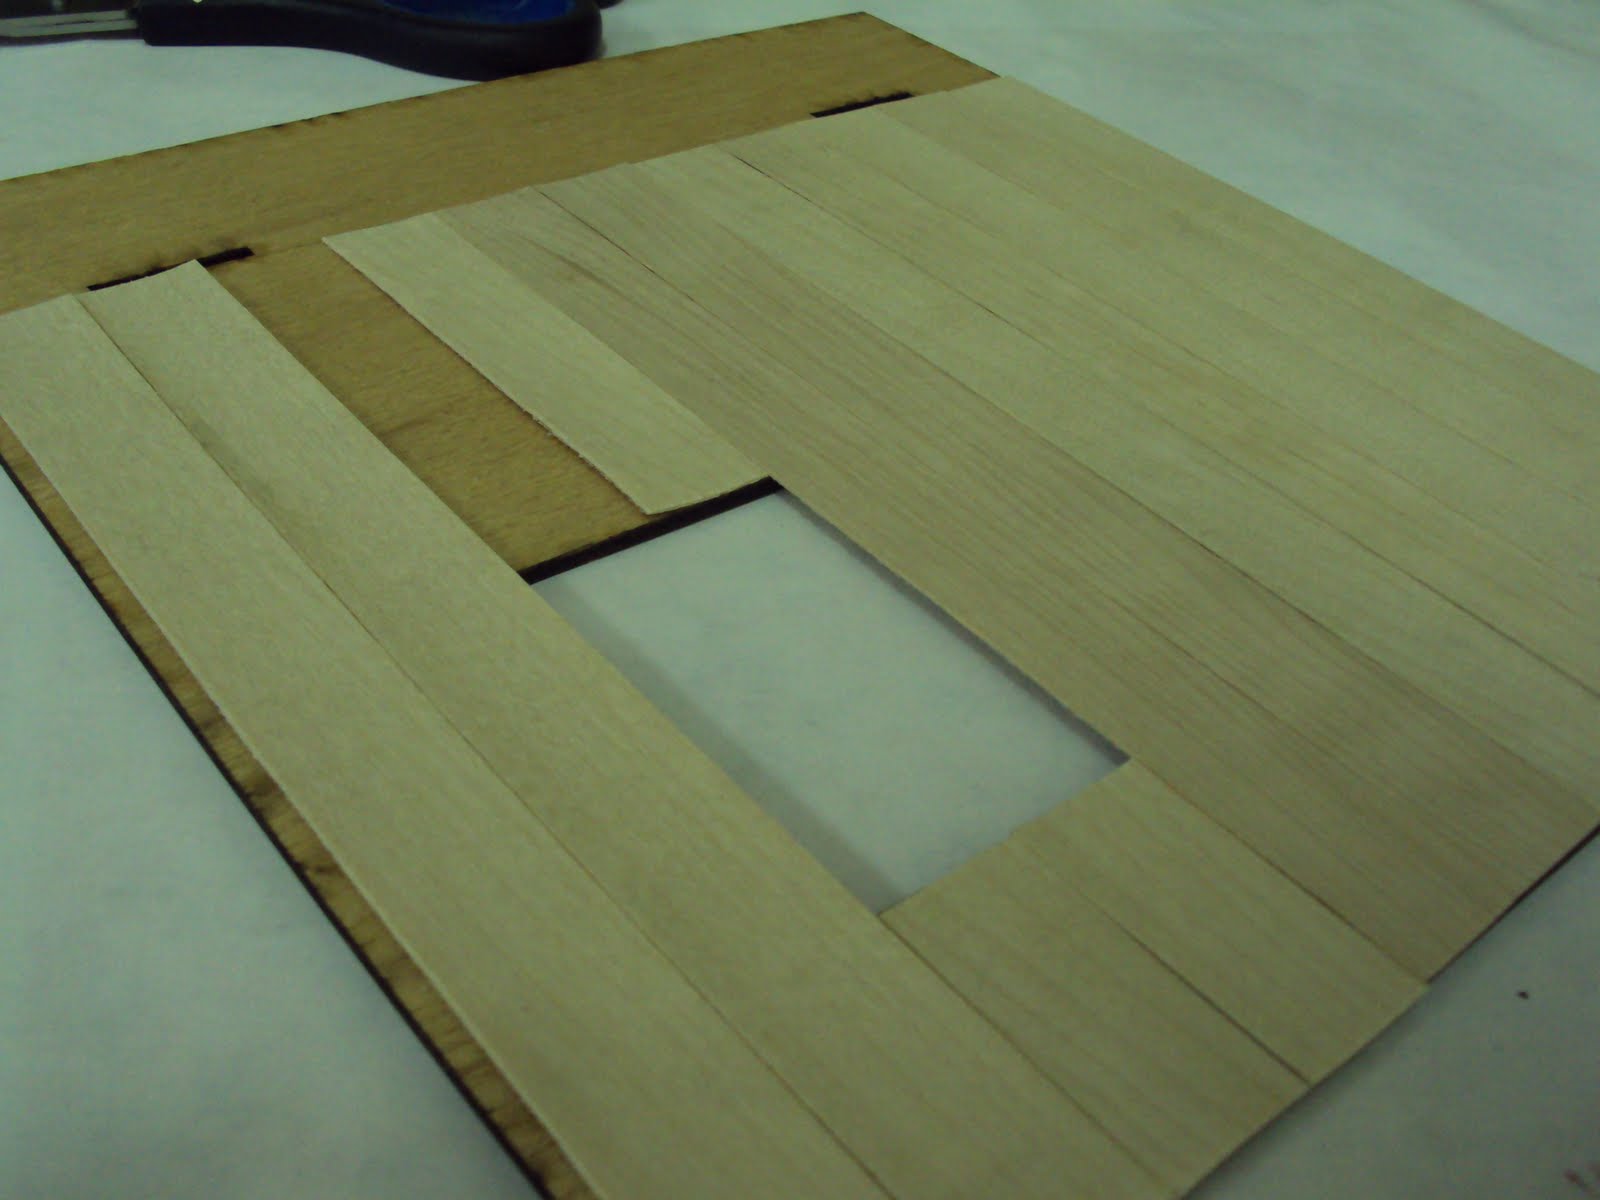
My Trick for Making Realistic Wood Floors
I adore wood floors, even the mini kind! Whether stained, painted, parquet, or rustic, I think they make a dollhouse seem lifelike and warm. Below is the tiny kitchen floor in a house I no longer have. In the staining process, I did a sort of reverse stencil on the floor. I masked off the design around the edges and then stained. I then removed the stencil and sealed it. When I sealed it with Modge Podge it blended just the right amount of stain onto the masked area to tint it slightly. Happy accident!
Next is a mahogany stained floor in my Orchid with narrow planks to fit the scale of this tiny house. It was the first wood flooring I tried and I loved how it turned out.
Here in my Orange Blossom, you see not only wood floors, but also plank walls. All of my houses have used the exact same trick that I'm about to explain...
Labels:
Orange Blossom,
Orchid,
walls,
wood floors
Sunday, September 26, 2010
The Galleries Are Open!
My Galleries are Open! At the top of the sidebar to the right -----> there is a list of three galleries of houses that I have completed. Then again is any dollhouse ever really complete? A couple of the pages had a 1-2 pics previously but now they are full of pictures that you can click on and enlarge and spot all the little details and mini-flaws! Enjoy!
You can visit the Orchid Ladies' Shoppe:
.jpg)
.jpg)
or the Westville which is a 1930's farmhouse:
or the Orange Blossom, which is a citrus packing house from old Florida:
See all the pictures for each in the galleries. Happy clicking!
Wednesday, September 15, 2010
Vintage Graphic Art Meets Furniture
Labels:
beacon hill,
country,
labels
A Little Bit Country...
... but not at all rock-n-roll! I found this House of Miniatures drysink kit already assembled for $2 at a odds and ends store and decided that since dry sink= country, I would go all out with a aged painted finish like you see in Pennsylvania dutch furniture. It had to be painted because...
... whoever assembled the kit previously intended to stain it and mixed stain with the glue to make sure there would be no glue spots showing when they stained it after assembly. Ingenious! Not the color stain I wanted though, so I got to play with paint. Can you see the dark brown spots at the joints?
Below you can see the silvery grey aging that I added by painting on a mixture of black India ink and rubbing alcohol. It works miracles! After that dried, I painted, sanded, applied stain over the paint and sanded some more.
From blotchy natural wood to weathered and worn, just the way I like it. Now if only I could figure out how to make hardware...
Saturday, September 4, 2010
Jumping back to Shabby
This is o-so-belated! The wonderful Casey Mini nominated me for a blog award called "Strange Men in Pinstriped Suits." Can you believe that she thinks that I have a tendency to jump from one project to another? Who Me?? I have no idea what... well, wait... Here is my latest mini project, jumping back to shabby chic accessories rather than finishing the bricking of my Beacon Hill, staining of furniture kits, completing the little girl's traveling trunk or the country style items that I've been working on. Casey, you are so wise!!
This is a shabby jewelry box designed to sit on a dresser top. It is supposed to look as if someone framed a tin ceiling tile that is weathered and has a bit of rust peeking through the crusty paint. The drawer front is two polymer clay tiles that I made using a scrapbooking stamp. The "rust" is from a kit but I'm not sure that I wouldn't have done even better if I had just used a rusty colored little paint. Here's a tip for you that you may not have tried... see the little "arm" brackets on each side of the tile? They are slices of crown molding! Thank goodness for my Easy Cutter. Poke the pictures for a closer look.


This is o-so-belated so I apologize! The wonderful Casey Mini nominated me for a blog award called "Strange Men in Pinstriped Suits." Can you believe that she thinks that I have a tendency to jump from one project to another? Who Me?? I have no idea what... well, wait... Here is my latest mini project, jumping back to shabby chic accessories rather than finishing the bricking of my Beacon Hill, staining of furniture kits, a little girl's traveling trunk or the country style items that I've been working on. Casey, you are so wise!!
Labels:
shabby chic,
stamp,
tips
Saturday, August 14, 2010
Mini and Major Accomplishments
Hi all! There has been a slight lull in my posts because this last weekend I graduated with my masters degree in education :) Whoo hoo!! I somehow managed to do it while being a teacher, wife, and mother and now look forward to a few less nights burning the midnight oil reading heavy textbooks. I learned so much, but it will be nice to just stay up because I want to and not because a paper is due. Freedom!
Thanks for all the responses to my previous post about whether my little cabinet should be hung or be a sideboard; great thoughts! I love that these blogs become a mini-community! I've really appreciated your honest input and support and sharing your own gifts too. Minis and this blog community has become such a stress reliever and creative outlet. Thanks for bringing a "little" balance to my life. (Forgive the pun!)
In the minis world, I've been working on adding architectural details to my Beacon Hill (which I will write about soon), but for a smaller project, I'm also working on a little girl's travel trunk. While the bunny I attempted is far too embarrassing to post right now, this is the first doll that I've made. I'm still learning!
Subscribe to:
Posts (Atom)